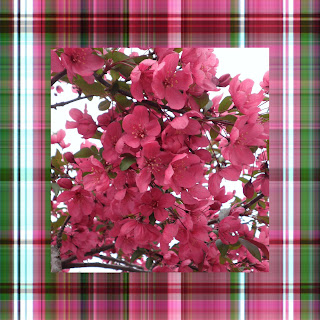
I mentioned in my last post that I would like to try my hand at a tutorial. Since I have never put together a tutorial, I quickly decided that the paper I created in the last post is a bit complex as a topic for my first tutorial (there are multiple stages including brush creation and the use of multiple software applications). Having read/viewed hundreds of tutorials in my quest to learn more about digital design, I have found that a tutorial needs to be simple enough for the novice to understand but not too detailed so as to loose the interest of the reader/viewer. I did not feel that I could do the paper from my last post justice as I am not experienced with writing tutorials, so I will save that paper for a potential future tutorial (or set of tutorials).
Since the paper from my last post was out as a first tutorial topic, I decided that I would do a very simple tutorial to test the waters and yet still offer something that might be of use to others. I have seen this technique discussed in various places but I have not come across a detailed tutorial for this technique nor a tutorial for GIMP (in honesty, I have not specifically searched for either so I wouldn't be surprised if a simple web search came up with both). In my first tutorial I will be demonstrating a technique to create a plaid paper with a color scheme that is matched to a photo. Although this might sound complex, the technique is actually very simple and creates a nice looking paper that is customized to the photo that is used to create it. I am fully aware that the term "plaid" varies in meaning according to where you live, so please forgive my usage of it if it does not have quite the same meaning in your geography. The paper that I will be creating is a horizontal and vertical criss-crossed stripe pattern with a color set that comes from a base photo chosen by the user when creating the paper. I will include a link to the final paper in XCF file format with layers so you save out my flower photo and re-create the tutorial on your own. I am not a photographer and the photo was taken on a pocket point-and-shoot digital camera, so please no comments on the quality of the flower photography.
Once I decided on the tutorial topic, I started to assemble a text tutorial but quickly realized that it was harder than I anticipated to walk through the steps in text and screen shots (I felt like I was leaving a lot out and wanted to create screen shots for everything). Since I didn't want to miss anything and confuse the reader, I opted to attempt a video tutorial instead. Please forgive any newbie mistakes and definitely share your comments as I will take them into consideration in any future tutorial attempts that I make.
Thanks for stopping by My Part of the Page!
Happy scrapping,
Brian
Without further delay, the tutorial:
In case you prefer the YouTube version, you can find it here.
And the download for the tutorial (With a bonus 12x12 gold polka dot png file - why not since I created it and I'm not sure what else to do with it. If you do something creative with this file and don't mind sharing, please return and post a link so that I can see how it's being used.):